

Single Sign-On
Single Sign-On (SSO) lets you sign in to SEON with the credentials you use to log in to an identity provider, adding an extra layer of security to your and your team's accounts. This page contains all the information you need to enable and properly configure your SSO settings.
We've created verified integration guides with key providers. Use the corresponding guide below if you use one of our verified SSO providers. These will lead you through the setup process step-by-step and ensure you don't have any issues. We are continuously expanding the list of setup guides.
If you've chosen another provider, the information below will cover everything you need. Contact our Technical Services team if you run into issues or need more information.
You should be able to set up any Identity Provider that supports SAML authentication. Due to the nature of the SAML protocol setting up SSO should generally be similar regardless of the provider you chose. While the specific names of fields can change from service to service, you will need to provide the data listed below. Contact our Technical Services team if you run into issues or need more information.
Starting Setup
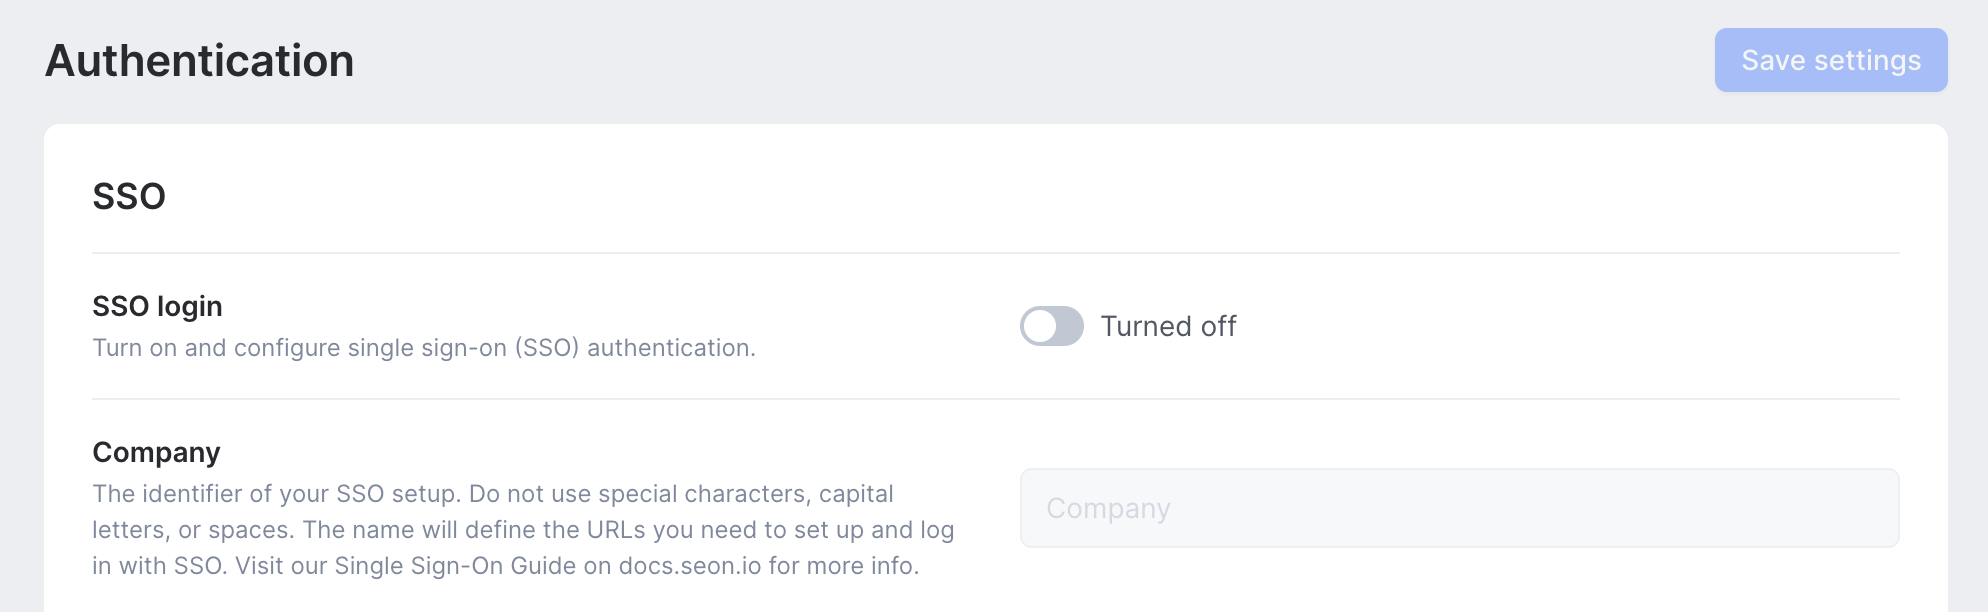
To get started, open the Settings page of the SEON Admin Panel. The Authentication tab houses all the settings you'll need to configure.
1. Click the Turn on SSO Login toggle to begin.
2. Set your company name in the company field. Avoid using capital letters, special characters, and spaces.
3. Click Save. The company name you set will define the URIs you need for setup.
4. Leave this tab open; you will need it again later.
URLs for setup
In each instance, replace the company section with the name set on the settings page.
- Assertion Consumer Service (ACS):
https://admin.seon.io/sso/acs/company - Audience URI (SP Entity ID):
https://admin.seon.io/sso/metadata/company
Head over to the Admin panel of your IDP and create a new SAML application or connection. The exact process will depend on the provider you are using. Try searching their knowledge base for a guide on how to do this.
1. If your provider gives you setup options, choose to complete the process manually.
2. Locate the ACS URLs field on the setup panel and copy the ACS link above.
3. Identify the Entity ID field (which may have a different name) and copy the Audience URL above.
Continue to attribute mapping. The location of these settings will also differ by provider.
Attribute mapping
You'll have to map the attributes sent by your identity provider using XML schemas. The mapping ensures that SEON and your IDP know which data string is a user's name, which one is their email address etc.
The exact way you can map identities differs by provider. Try searching their knowledge base for more guidance. You will need the following URIs without changing anything:
- Email:
http://schemas.xmlsoap.org/ws/2005/05/identity/claims/emailaddress - First name:
http://schemas.xmlsoap.org/ws/2005/05/identity/claims/givenname - Last name:
http://schemas.xmlsoap.org/ws/2005/05/identity/claims/surname
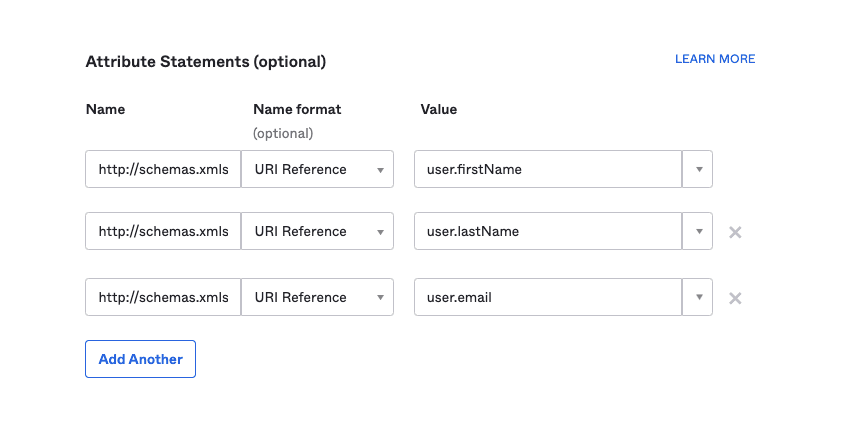
Example of attribute mapping in Okta
Configuring SEON
Once you've completed mapping, you must connect your IDP and SEON.
- Locate the Service URL on the Admin panel of your IDP. The URL can have different names, such as Single Sign-On Service URL or similar).
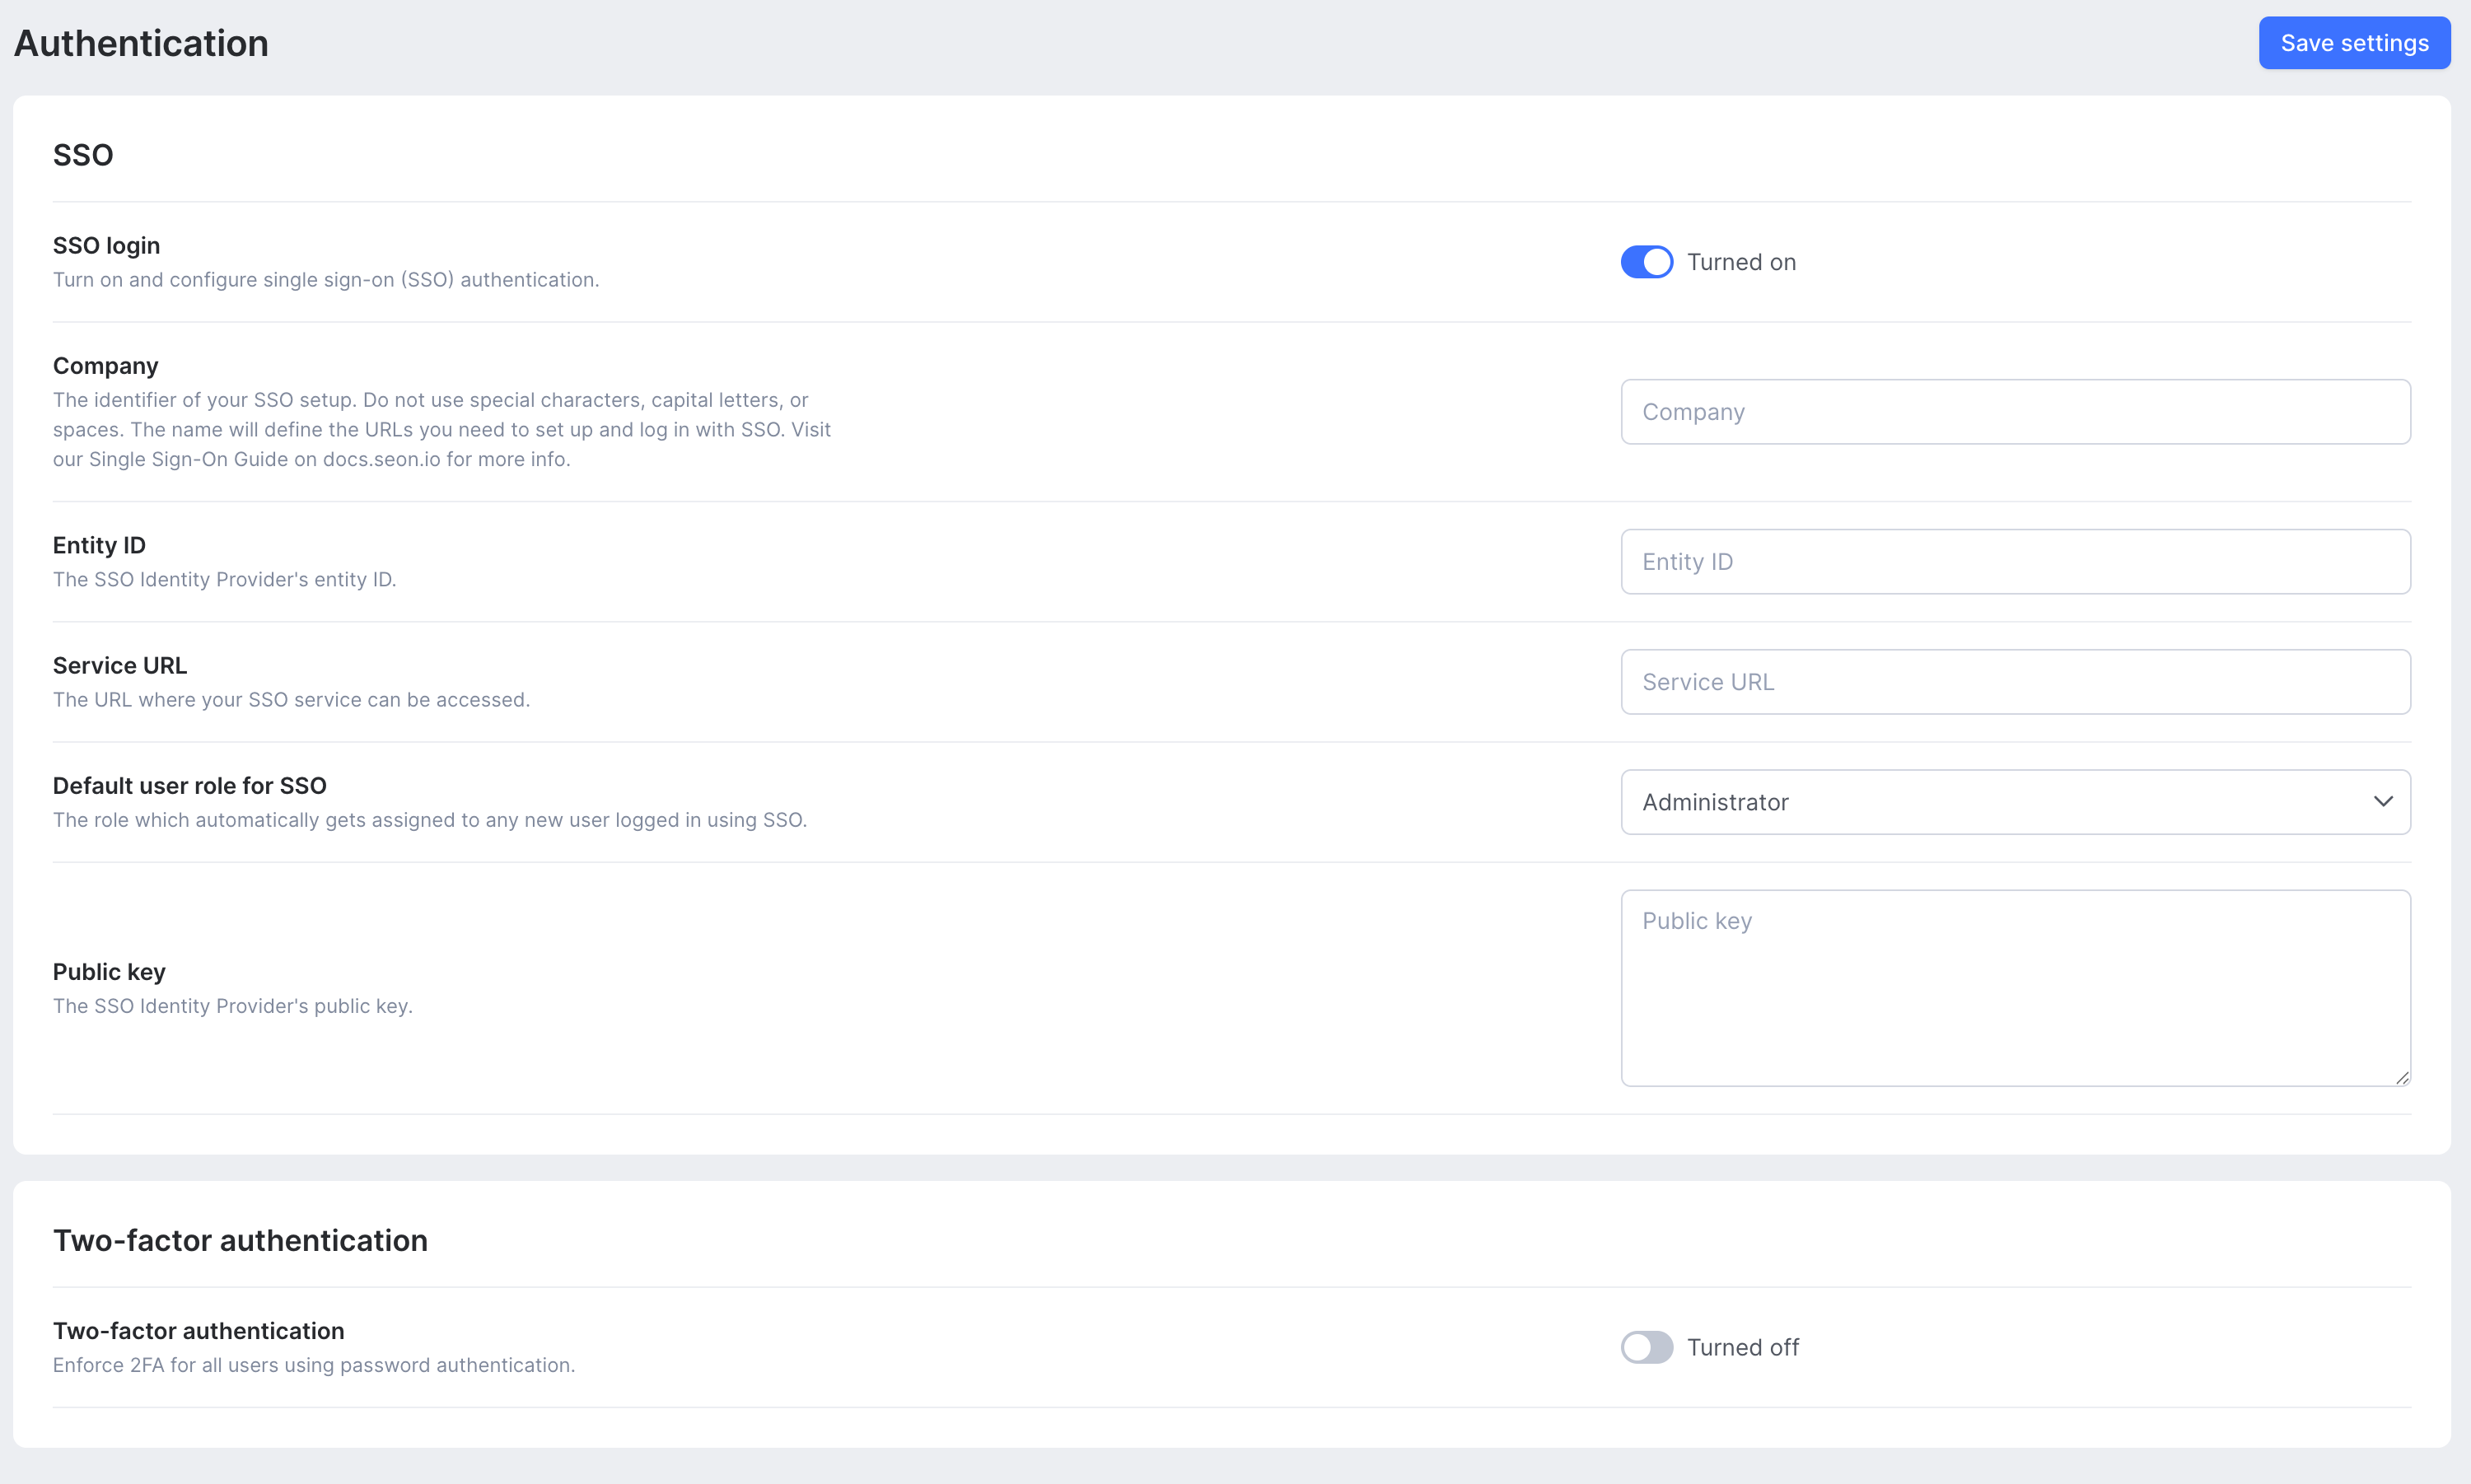
- Copy the URL and navigate to the Authentication tab of the SEON Settings page.
- Paste the URL into the Service URL field.
- Locate the IDP Metadata URL and copy it.
- Paste the URL into the Entity ID field on the Authentication tab of the SEON Settings page.
- You will need the Public Key to complete the setup. Depending on your service provider, you may find this on their admin panel or have to download the certificate and copy the public key field manually from a text editor.
- Paste the key into the Public Key field of the Authentication tab of the SEON Settings page.
- Default user role for SSO logins – all new users will be assigned this role when they login to SEON using SSO
- Click Save Settings.
- Test your SSO Login.
Tips for using SEON with SSO
- Once a user logs in with SSO, they will no longer be able to log in with their email and password.
- Do not invite new users to SEON from the Admin Panel if you have enabled SSO. Add them through your SSO dashboard or ask them to log in to SEON.
- After setting up SSO, you will no longer have to add users manually. Ask new users to log in using SSO, and a new account will be created for them automatically.
- To log in using SSO, visit admin.seon.io/login/[company]. Replace [company] with the company name you provided on the Settings page.