

SSO with Okta – Setup Guide
Updated on 17.09.24
10 minutes to read
Copy link
Overview
Properly configured single sign-on (SSO) can be a vital element of your cyber and network security toolset. You can reduce your company's attack surfaces by slashing the services your team has to log in to and the number of credentials they handle.
Set up SSO in SEON to make your fraud-fighting experience seamless and secure.
Using Okta with SEON
Okta is one of the world's largest and most trusted identity platforms that over 16.000 business use to improve cybersecurity. As SEON supports SAML authentication integrations setting up SSO with Okta is a breeze.
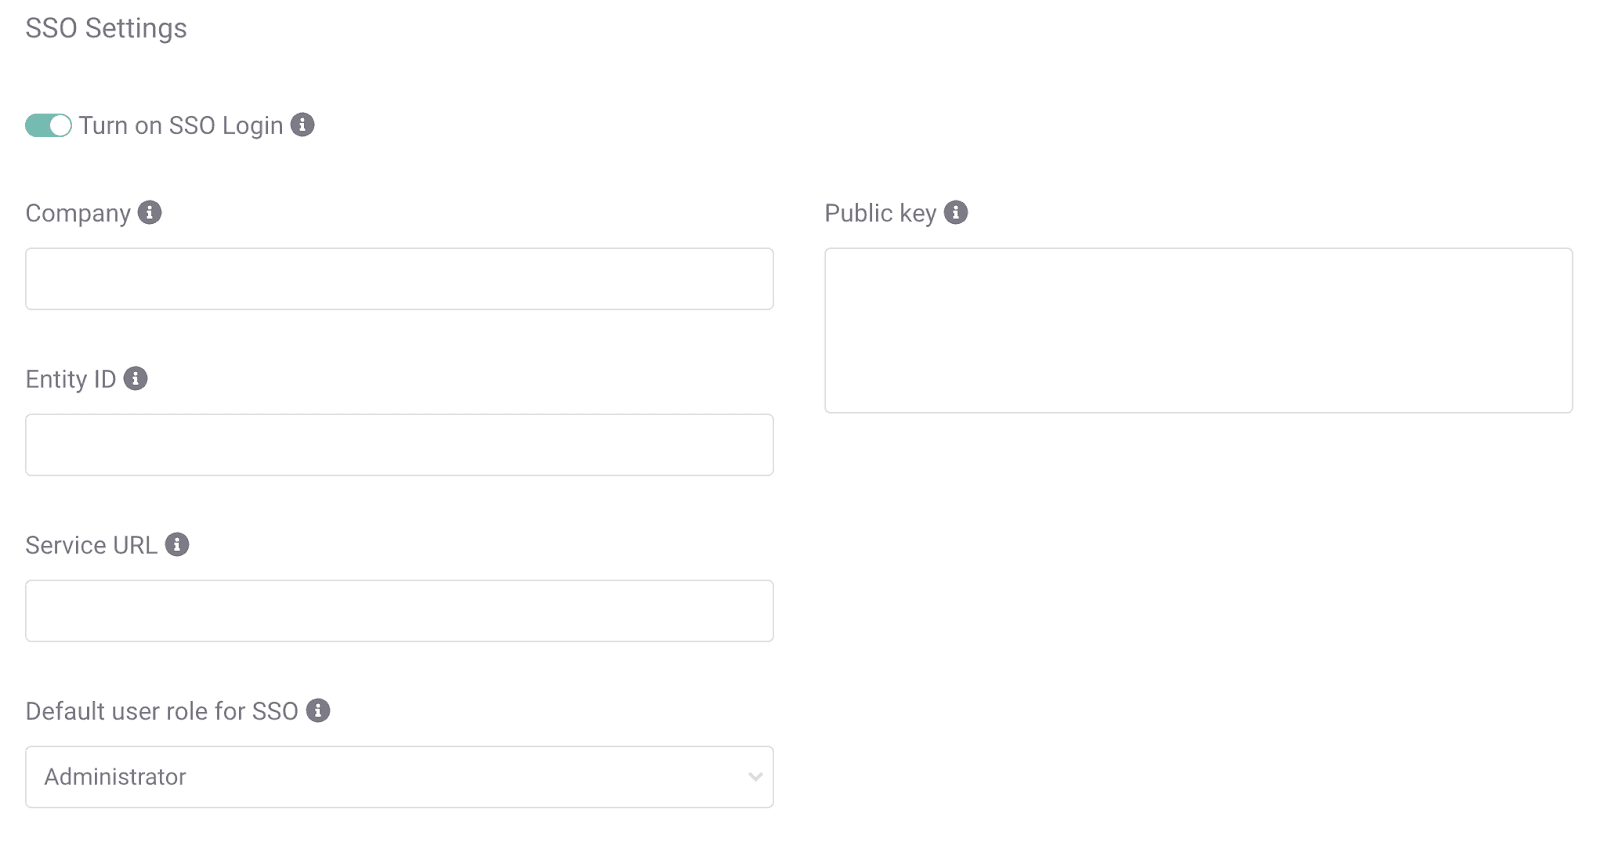
You'll need admin access to both your Okta Dashboard and your SEON account before you start. Visit the Settings page in SEON and double-check that you can access the SSO settings on the Authentication tab before continuing.
Step-by-Step: Setting up SSO with Okta
1. Head to Settings in SEON.
2. Open the Authentication tab.
3. Click the toggle next to Turn on SSO Login.
4. Add a name to the Company field.
5. Open the Okta Dashboard.
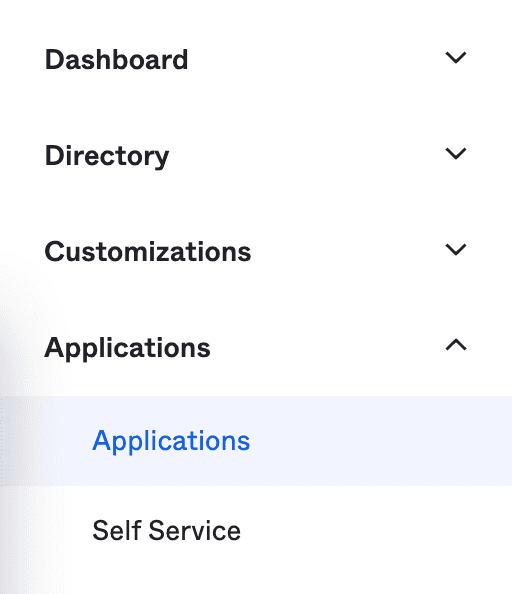
6. Navigate to Applications using the menu on the left of the window.
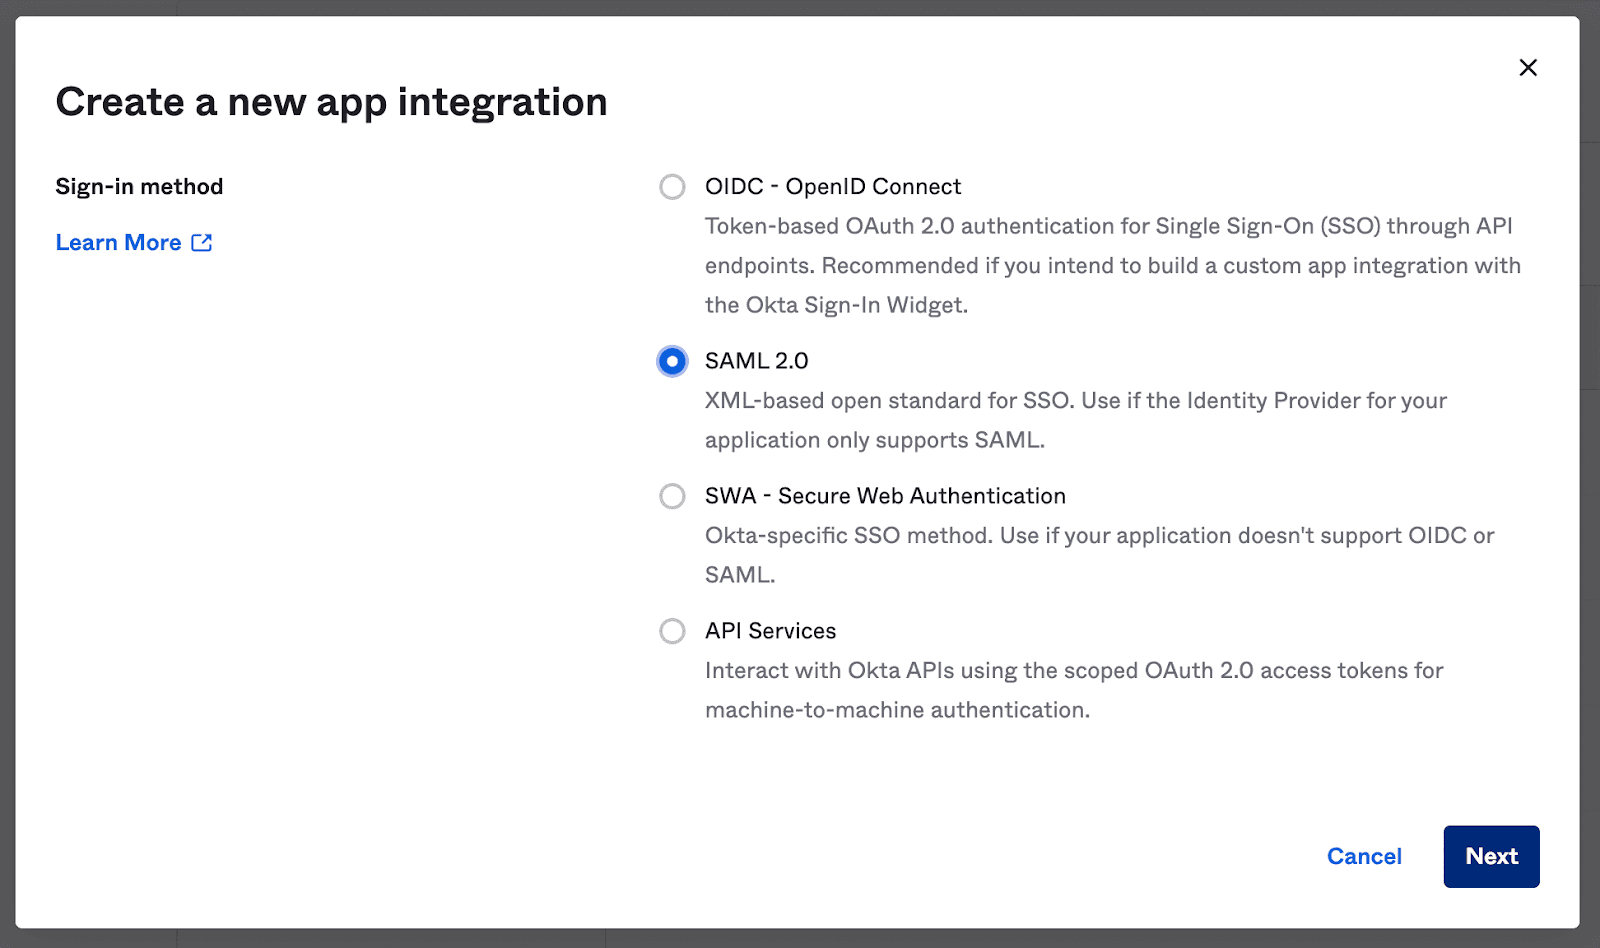
7. Click Create App Integration.

8. Select SAML 2.0 on the modal that pops up and click Next.
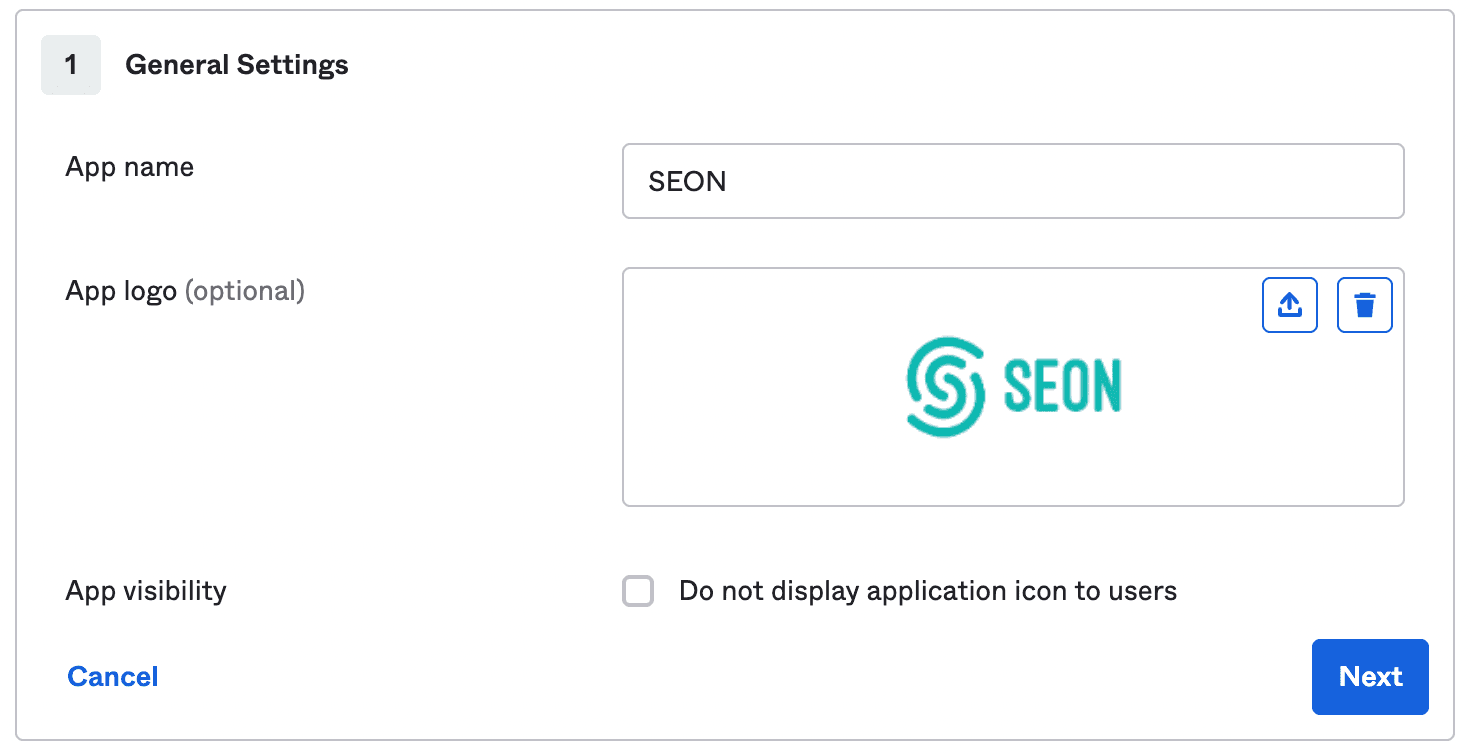
9. Name your application (SEON) and feel free to upload our logo, then click Next.
10. Let's now configure Okta to work correctly.
11. Jump over to the SEON Integration SSO page or copy the ACS URL below:
https://admin.seon.io/sso/acs/company
12. Paste the ACS URL into the Single sign on URL field in Okta
13. Jump back to our SSO integration page or copy the Audience URI below:
https://admin.seon.io/sso/metadata/company
14. Paste the URI into the Aucidence URI field in Okta.
15. Replace "company" in the URL strings with the Company name you set on the SEON Admin panel in Step 4.
16. Click Save.
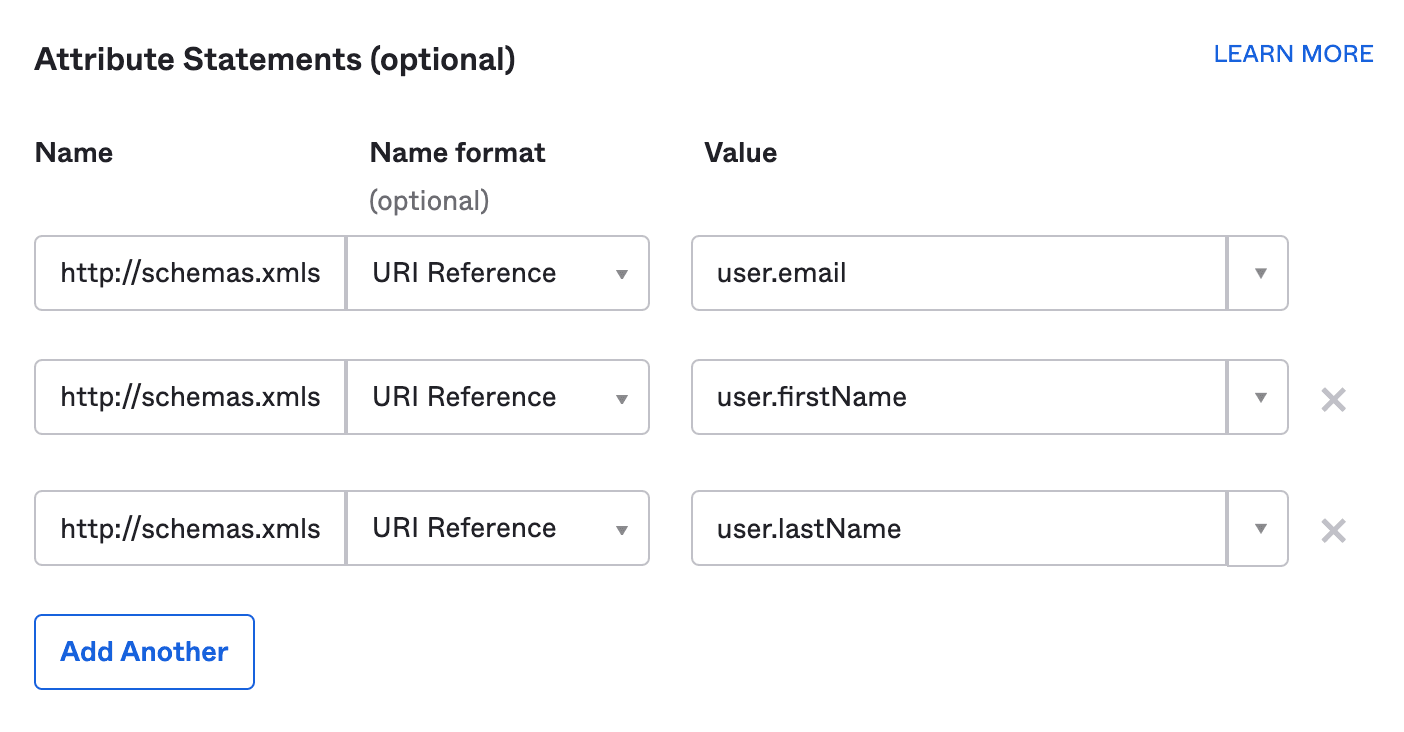
17. Scroll down to the Attribute Statements section to continue.
18. Copy the email URI from the Integration SSO page or below
http://schemas.xmlsoap.org/ws/2005/05/identity/claims/emailaddress
19. Paste it into the Name field of the existing row.
20. Set the Name Format field to URI reference using the dropdown menu.
21. Set the Value field to “user.email” using the dropdown.
22. Click Add another.
23. Copy the first name URI from the Integrations SSO page or below
http://schemas.xmlsoap.org/ws/2005/05/identity/claims/givenname
24. Paste it into the Name field of the second row.
25. Set the Name Format field to URI reference using the dropdown menu.
26. Set the Value field to “user.firstName” using the dropdown.
27. Click Add another.
28. Copy the surname URI from the Integrations SSO page or below
http://schemas.xmlsoap.org/ws/2005/05/identity/claims/surname
29. Paste it into the Name field of the third row.
30. Set the Name Format field to URI reference using the dropdown menu.
31. Set the Value field to “user.lastName” using the dropdown.
32. Scroll down to the bottom of the page and click Next.
33. Complete the Okta survey as you see fit. Only the first question is required.
34. Scroll down and locate the SAML Signing Certificates section. Click on View SAML setup instructions on the right.
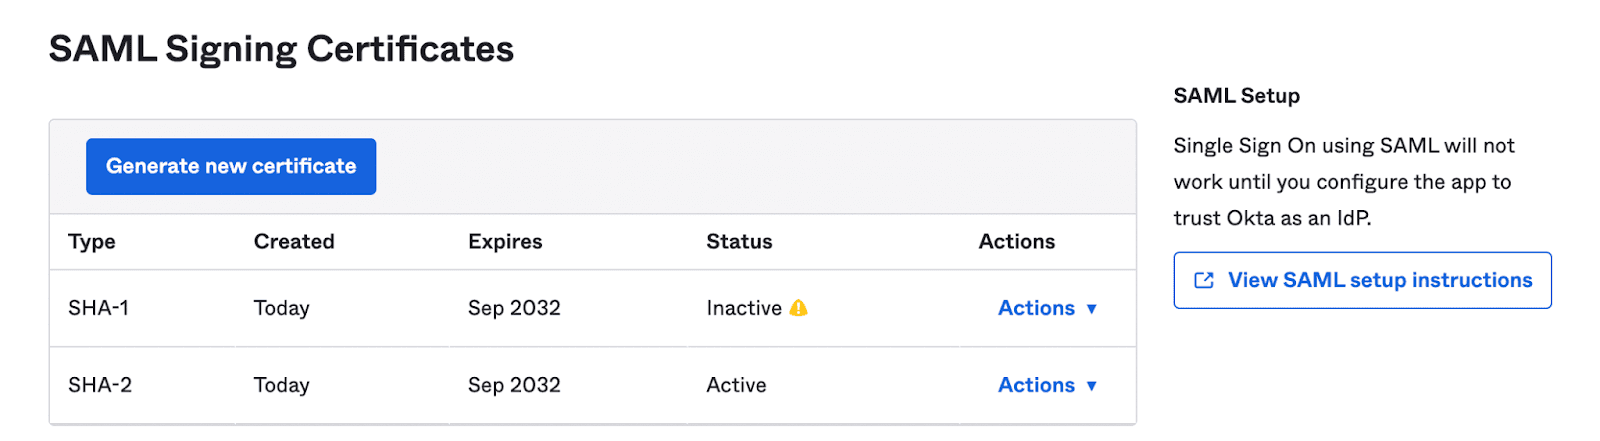
35. Copy the Identity Provider Single Sign-On URL from Okta.
36. Open the Authentication tab of the SEON Settings page.
37. Paste the URL into the Service URL field.

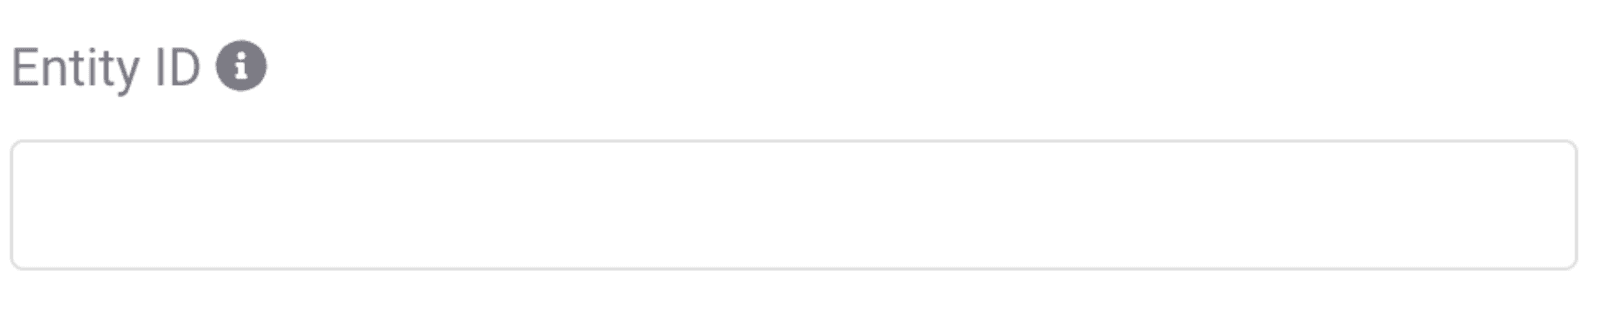
38. Head back to Okta and copy the Identity Provider Issuer URL.
39. Paste the URL into the Entity ID field on the Authentication tab of the SEON Settings page.
40. Go back to Okta and copy the X.509 Certificate.
41. Paste the key into the Public Key field of the Authentication tab of the SEON Settings page.
42. Click Save Settings.
43. Congratulations! You've successfully configured SSO using Okta.