

How to run a batch test
Updated on 19.02.26
3 minutes to read
Copy link
Overview
Time is our most valuable asset, and catching fraudsters can be a time-consuming mission. SEON is here for you to save you precious working hours so you can focus on growing your business.
Thanks to the batch tester, you have the opportunity to run multiple calls at the same time through our APIs, and it allows you to test historical customer and transactional data in order to create better-performing rules and a highly accurate scoring model, even if you don't have SEON integrated yet.
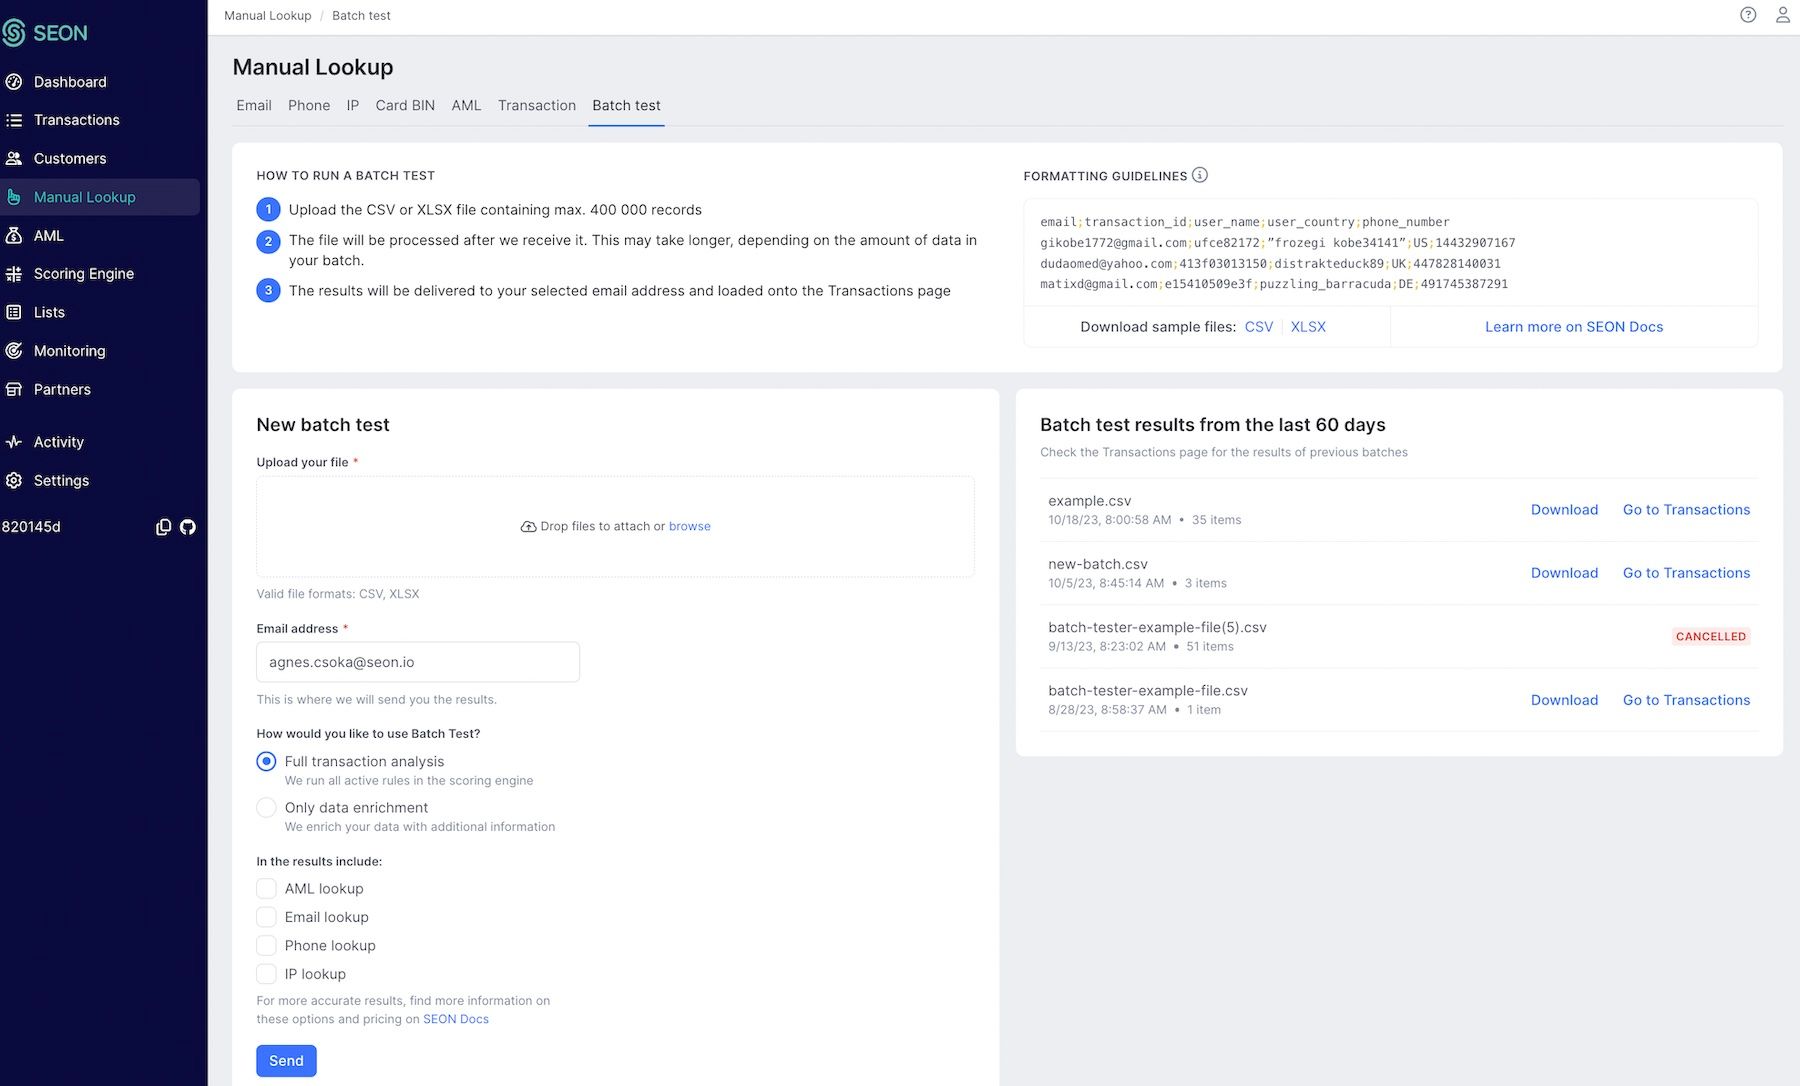
Preparing your batch test
To run a batch test, all you need is a CSV or XLSX file containing all the data you want to upload. Before doing so, check the formatting guidelines in the top right corner of the page or download a sample file and review it to make sure yours is structured correctly as well.
Download sample files: CSV, XLSX
Go through your data to check if you have the correct information under each header, and make sure you don’t have more than 400 000 records in the file. After upload, we'll check the first 50 rows of your file for formatting errors. Rows with errors will not be processed as part of the batch test.
Transactions in a batch file are processed with a 3500 ms timeout setting by default in order to make sure you get the most extensive and accurate enriched data.
Transactions processed in a batch file are also considered in velocity rules. Please know that they are applied based on the order of the transactions in your file and not based on the timestamps provided for individual transactions. In order to follow the correct timeline, make sure to list the transactions in chronological order in your batch file.
AML Customer Screening options
If you want to include AML (Anti-Money Laundering) customer screening, the default option screens against all data sources except adverse media (which incurs additional costs) and uses the default fuzzy configuration. However, you have the option to configure the sources on a per-call basis.
Data sources
To configure AML screening sources, include the following headers in your batch file:
- adversemedia_enabled
- sanction_enabled
- pep_enabled
- watchlist_enabled
- crimelist_enabled
Each row should have a TRUE or FALSE value based on whether the respective screening should be performed for that individual.
Monitoring and Fuzzy Configuration
To configure monitoring or fuzzy matching, include the following headers in your batch file:
- monitoring_required
- fuzzy_enabled
Each row should have a TRUE or FALSE value to indicate whether monitoring or fuzzy logic should be applied to the given record.
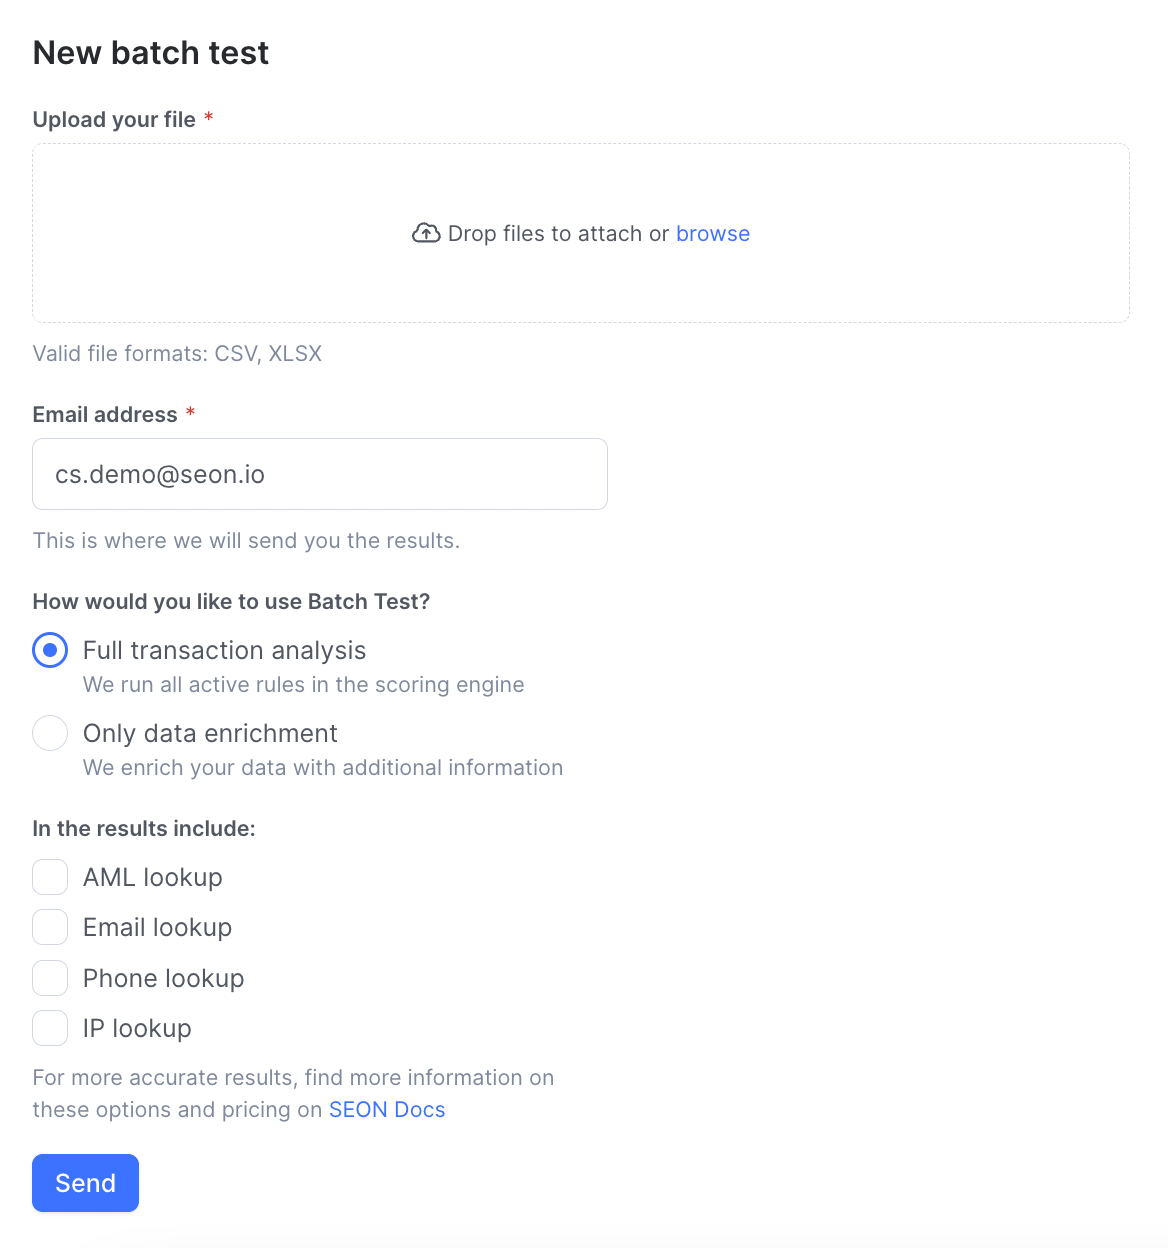
Using the batch tester
With the batch tester, you can analyze up to 400,000 events at once and have results emailed to you. They will also appear in your Transactions list, where you can review and monitor them later on.
- Go to the Batch test tab of the Manual Lookup page from the Admin panel.
- Upload your CSV or XLSX file in the New batch test widget.
- You can decide to do a full transaction analysis or only do the batch test for data enrichment purposes.
- You can also decide whether you want to run AML, Email, Phone or IP lookup (or all of the above).
- The file will be processed after we receive it. This may take longer, depending on the amount of data in your batch. You can also cancel a batch test in progress at the top of the widget.
- Once fully processed, the results will be delivered to the email address you need to provide under Email address. They will also be available from the Transactions page.
Once you've run one or multiple batch tests, you will be able to access the results from this page too from the last 60 days.