How to create a new filter
Updated on 19.09.25
5 minutes to read
Copy link
Overview
Filters are advanced search functions that help you find specific transactions. You can create new filters on the Transaction List page and save them for later use by anyone in your team. SEON also lets you combine filters with different logic operators for even more granularity.
Why set up filters?
In SEON, filters are one of your fraud analysts' most powerful tools. Even simple filters can help uncover fraud rings and identify any connected accounts.
For example, one of SEON's in-house fraud analysts discovered over 700 fraudulent accounts at an online gambling operator using two simple parameters:
- Email: Count of vowels is equal to zero.
- Email: Count of numbers is equal to zero.
When both statements are true, the email addresses are nearly always automatically generated and fraudulent.
However, as fraudsters are constantly evolving, sometimes you need more advanced filters to sift through all the data. Luckily, SEON's got you covered.
Build filters with AI
The Build filters with AI feature lets you create filters using plain language instead of complex queries. Simply type what you want to find — for example, “show me transactions over $500 from new devices” — and SEON will generate the corresponding filter automatically. You can refine the output through additional text prompts or adjust it using the standard UI before applying the filter.
How it works
Behind the scenes, SEON sends your input (together with context like field names, logic, and constraints) to an AI model, which returns a structured response that the platform interprets just like a manually built filter. No transaction data is shared with the model, and results can always be revised or edited before execution.
How to use it
1. Navigate to the Transactions or Customers page
Go to the Transactions or Customers page in SEON and click the Filter button.
2. Enter your filter prompt
Enter the filter criteria in the input field at the top.
3. Apply the filter
Review the suggested filter, then click Apply.
4. Refine if needed
Modify the filter using another prompt or adjust the fields manually.
5. Use filter history
The filter history feature lets you revisit or restore previous versions during the same session.
6. Provide feedback
Use the thumbs up and thumbs down icons to rate how helpful the filter was. Your feedback helps us continuously improve the experience.
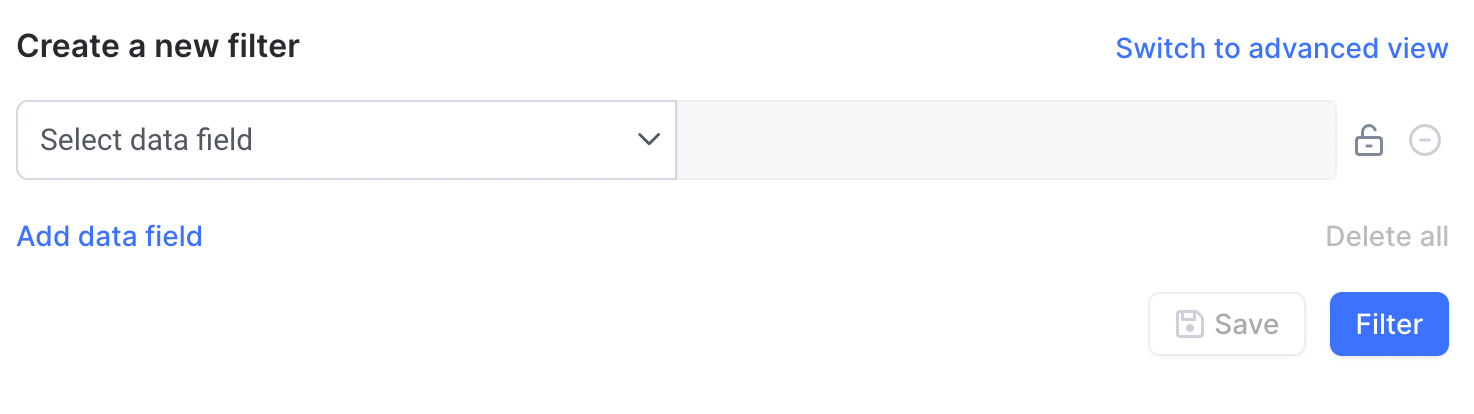
Create filters manually
1. Head to the Transaction List page to begin.
2. Click on the Filter button at the top of the list.

3. Click Create filter.
4. Click Add Data Field.
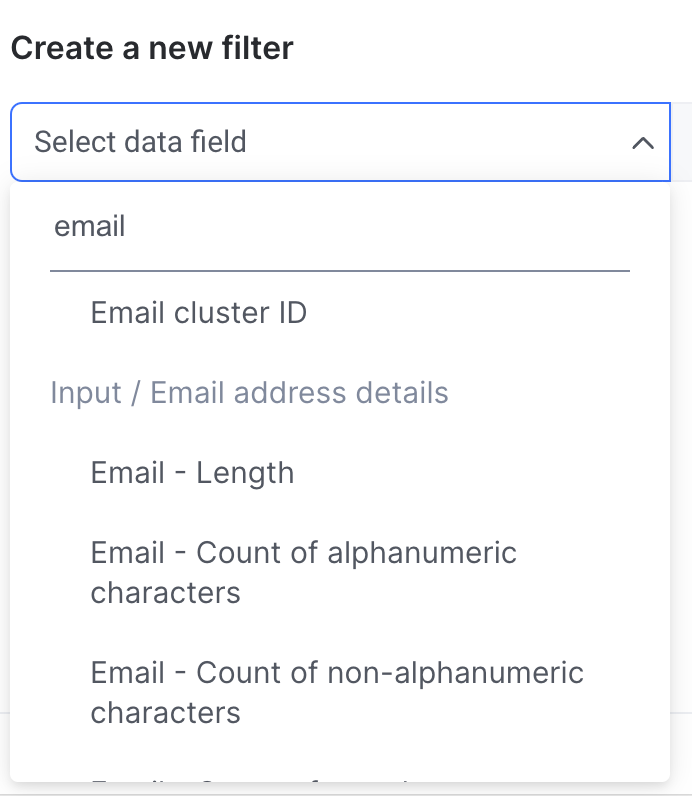
5. Click Select Data Field and use the search function to find "Email" related options.
6. Select Email – Count of vowels
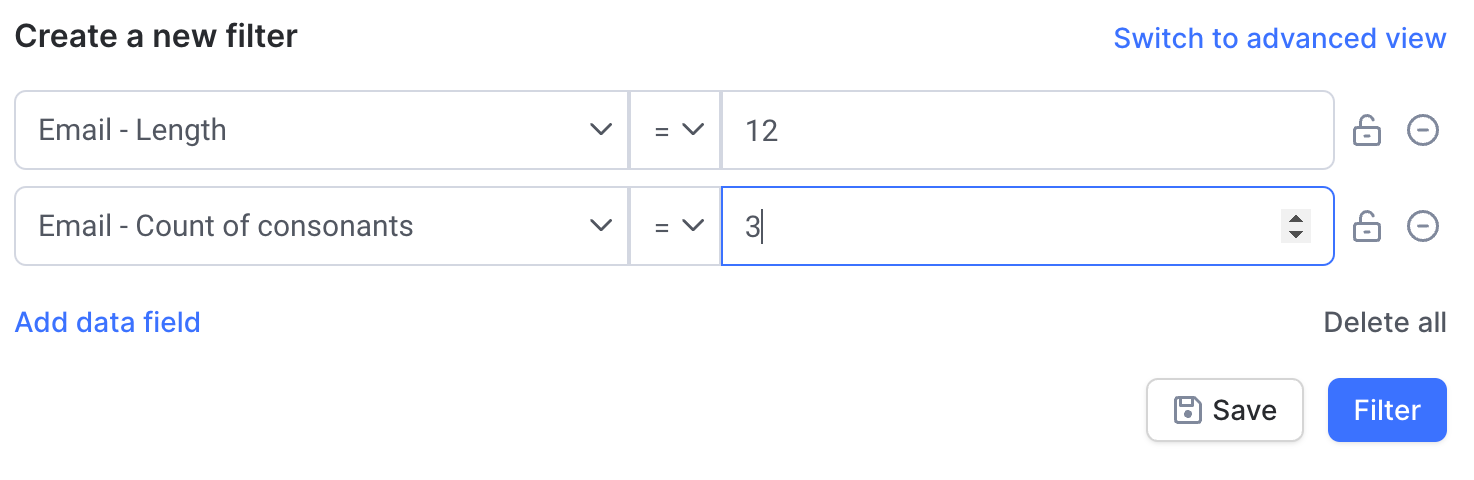
7. Select the required operator from the dropdown. In this case, choose is equal to.

8. Enter the value in the field to the right, 0 (zero), in our example.
9. Click Add data field again to create the next statement.
10. Repeat step two but this time choose Email – Count of consonants.
11. Set the desired operator and enter the filter value (zero again) to the right.
12. Click Filter to apply the query to your current view or click Save to store the filter for later use.
13. Enter a name for your Filter on the modal that appears.
14. Click Save.
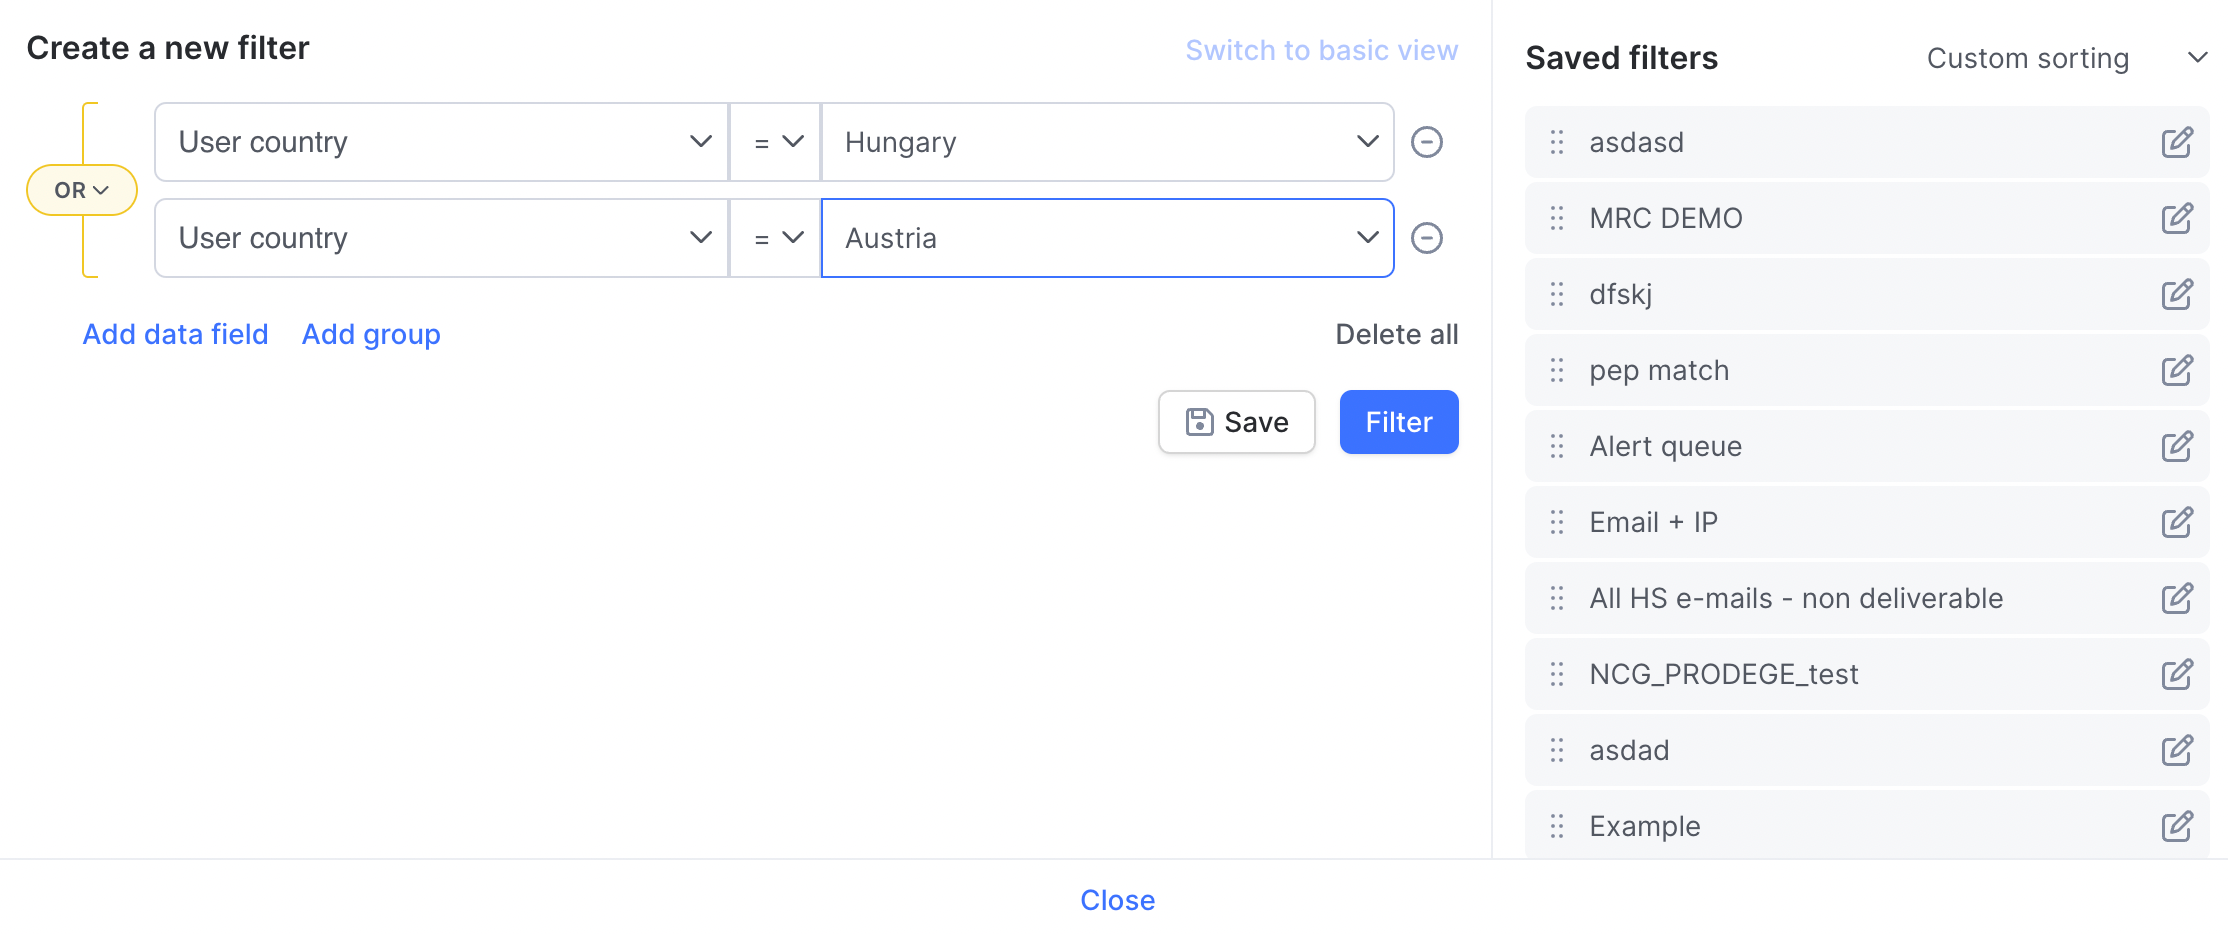
Advanced filters
Basic filters by default work AND attributes: you'll get a list of transactions where all the set data fields are applicable. Switch to advanced view to set up more complex filters where you can add OR attributes, meaning that you'll get a list of transactions where either one or the other data fields/groups are applicable.